Using Google Translation
The EasyTalk Dialogue System provides easy to use automatic translation via Google Translate API access. In order to use this automatic translation, you will need to set up a Google account and the Google CLI on your computer.
In order to use the automatic translation feature you will need an active Google Cloud account and you are solely responsible for any fees required by Google to access their cloud services.
Setting up a Google Cloud Project
Log in to your Google Account in a web browser.
Next, you will need to activate Google Cloud if you haven't aready by going here: https://console.cloud.google.com/
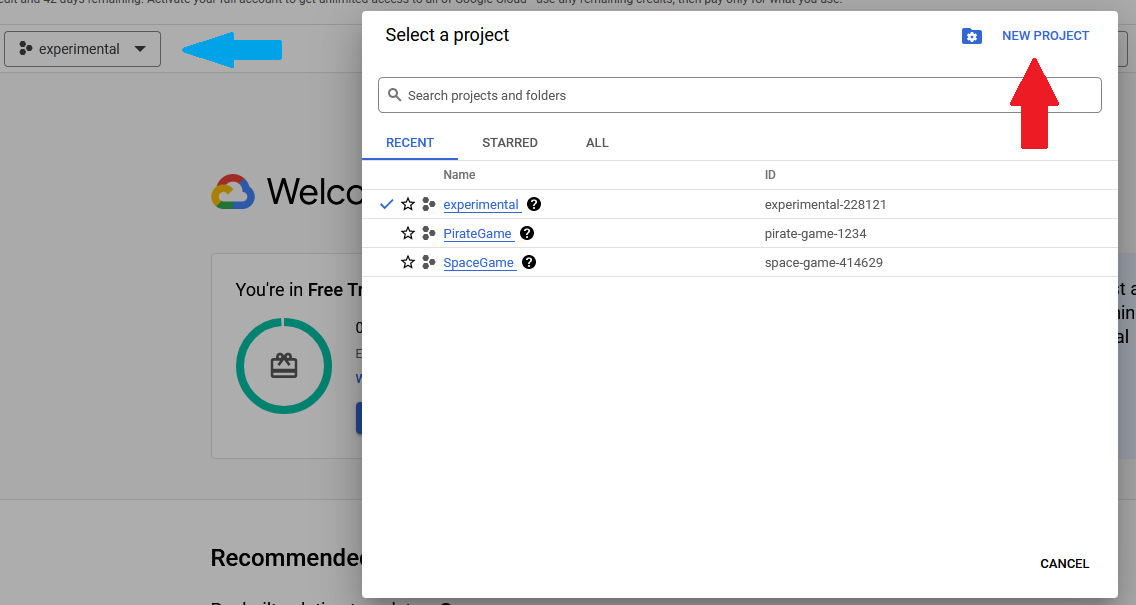
Once you have Google Cloud access, create a new project by clicking on the project dropdown, then clicking on "New Project" in the top right of the popup dialog.
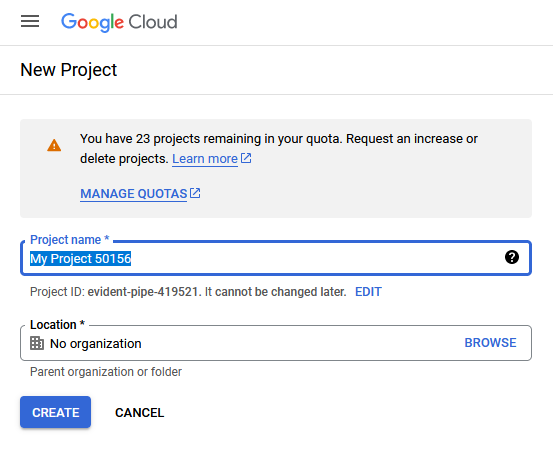
Next, enter the project name you want to use into the "Project Name" text field, then click "Create".
Enabling Cloud Translation Services
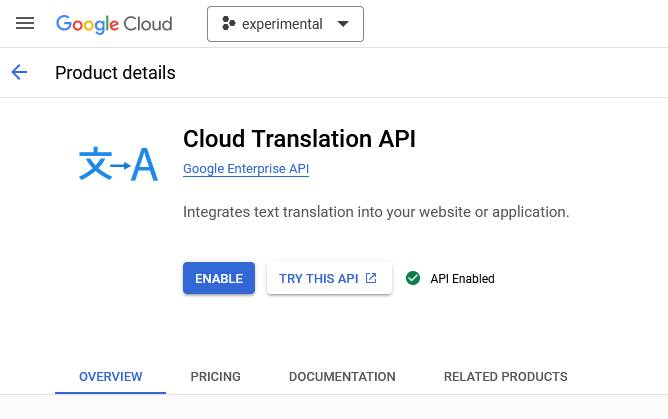
Enable the Cloud Translation API by going to the following link and clicking 'Enable': https://console.cloud.google.com/marketplace/product/google/translate.googleapis.com?hl=en&authuser=1
Set up a Service Account
Go to https://console.cloud.google.com/iam-admin/iam and choose your project from the project dropdown.
Next, on the left-hand side, click on "Service Accounts".
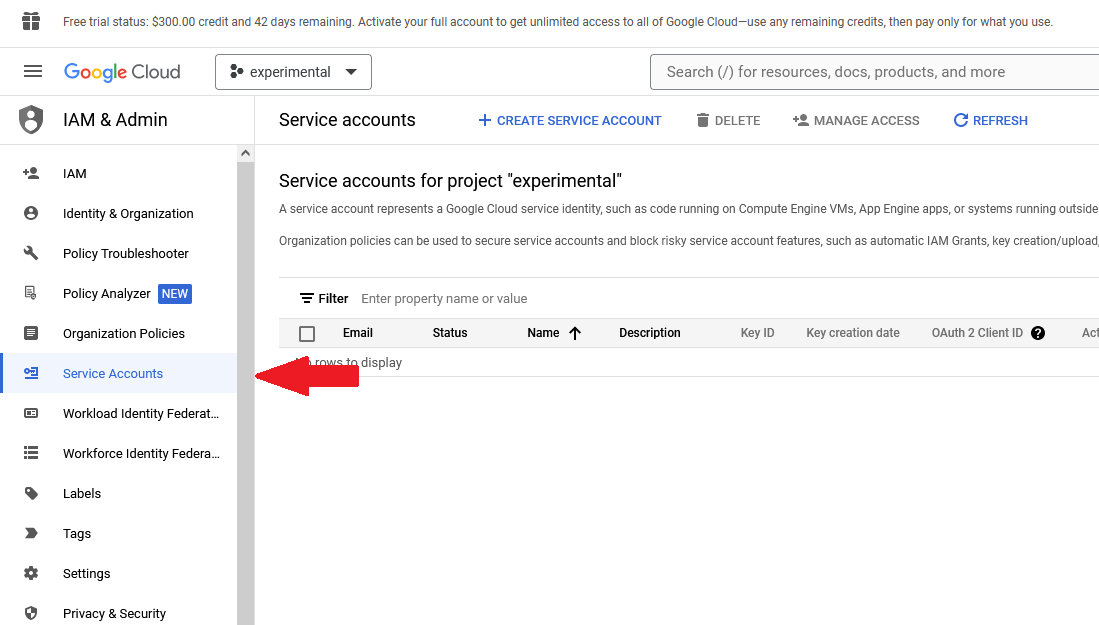
Fill in the details of the service account, replacing "my-account-name" with the name you want to give to the account.
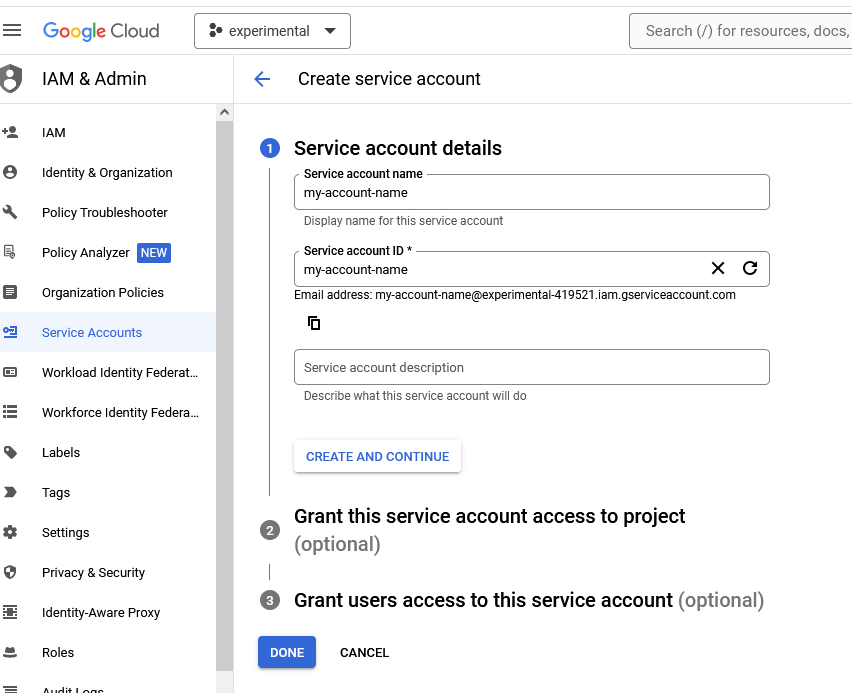
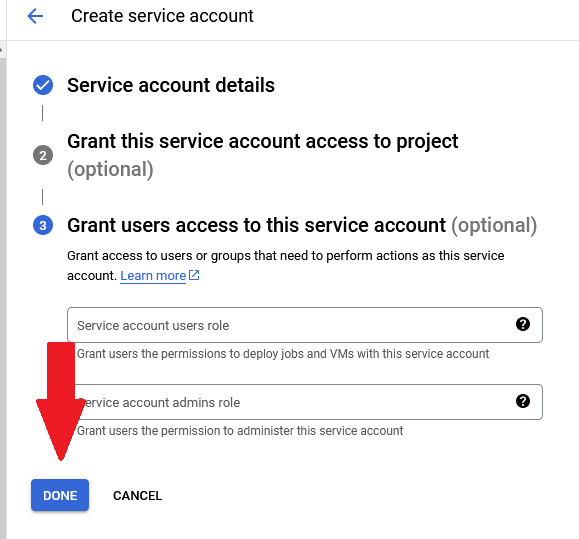
Continue through the remaing steps and click "Done".
Create a Service Account Key
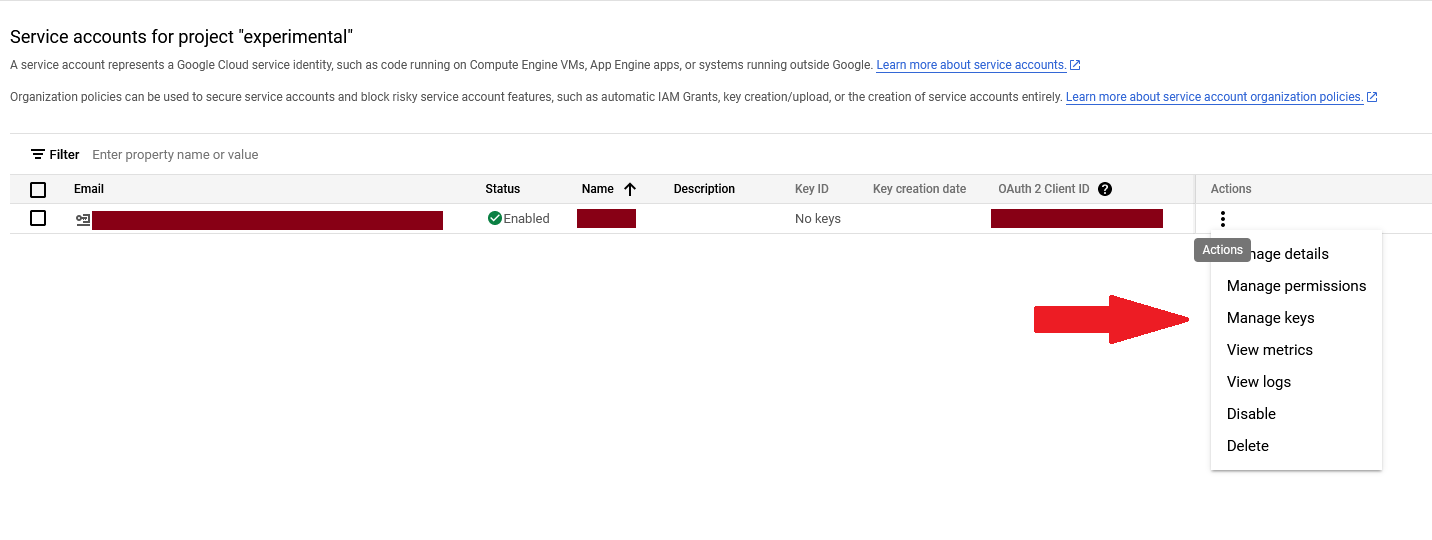
On the service account page, click on the three dots in the right corner, and choose "Manage Keys".
Click on "Add Key", then choose "Create New Key".
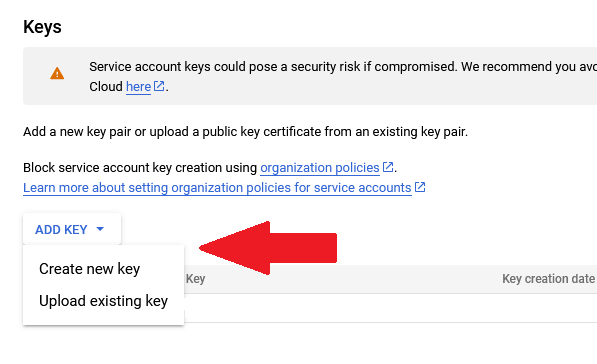
Choose JSON for the type, then click "Create" to download the new key file to your computer.
Setting up Google CLI
Download and install the Google CLI from https://cloud.google.com/sdk/docs/install-sdk
or you can download directly from https://dl.google.com/dl/cloudsdk/channels/rapid/GoogleCloudSDKInstaller.exe
Now we need to activate the service account using the service account key file we downloaded earlier.
Open a cmd prompt or terminal.
Next find the key file and enter the following command into the command line/terminal, replacing PATH_TO_KEY_FILE with the path to your key file:
gcloud auth activate-service-account --key-file="PATH_TO_KEY_FILE"
If the command was successful, you should now be able to generate access tokens for accessing the Google Cloud API and translating text from the Localization Panel.
To create a new access token, run the following command:
gcloud auth print-access-token
In the console/terminal, you should see a long string of characters which is your new Google API Access Token. The token is only valid for one hour from the time you created it.
Setting EasyTalk to use Google Cloud Translation
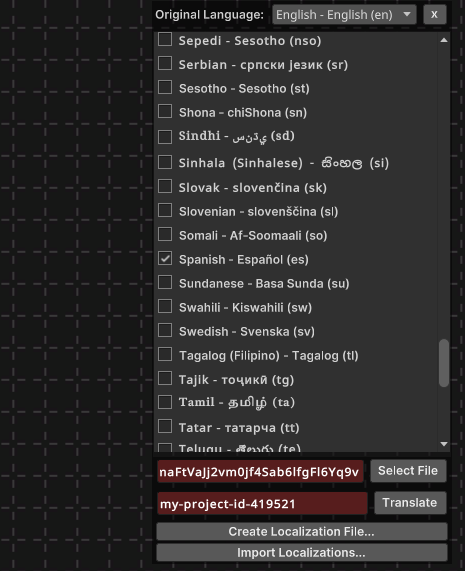
In the EasyTalk Node Editor, go to the Language Menu and choose "Localization...".
If Google CLI is included in your system's PATH, you don't really need to enter a Access Token into the Localization Panel, since EasyTalk is designed to automatically retrieve tokens as needed once setup is complete. But if that automatic process doesn't work, you can paste the Google access token into the Access Token field in the Localization Panel, then EasyTalk will use this access token to access the Google API when doing translations.
Access tokens expire one hour after they are created, so if you are manually pasting an access token, you will need to generate a new one if it's expired and you want to use the translation feature.
You will need to set the project ID in the Localization Panel to match the project ID of your Google project in order to use the automatic translation feature.
The project ID can be found by clicking in the Google Cloud project dropdown, and it will be displayed next to the project name.
Lastly, make sure your original language is set to the language your dialogue text is written in, and check all of the toggles for whichever languages you want to translate to.
Once you have everything set up, just click on the "Translate" button and all of the lines of dialogue, character names, and option text will automatically be translated to the languages you enabled in the Localization Panel! 😄
Make sure to save your Dialogue Asset after you use the translation feature, otherwise your translations will be lost!